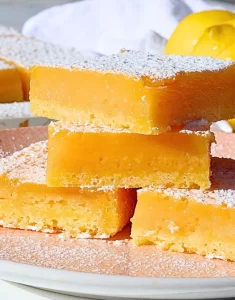
Easy Lemon Bars
So wonderfully tart & not-too-sweet, with a crisp, buttery crust on the bottom and a luscious lemon filling on top. The shortbread crust provides a sturdy base, while the lemon curd topping offers a burst of citrusy goodness in every bite. Best part is – they’re super easy to make!
Makes 24
Shortbread Crust
2 cups (240 g) plain flour
¼ cup (30 g) cornstarch
½ tsp salt – omit if using salted butter
1 cup (120 g) icing sugar
1 cup (226 g) unsalted butter – cold and cut into cubes
Lemon Curd Topping
2 cups (400 g) white sugar
2 Tab lemon zest – don’t skimp as you need it all & it stops it tasting eggy!
6 large eggs – room temperature
¾ cup (172 g) lemon juice – freshly squeezed – do not use bottled lemon juice.
(Zest the lemons before juicing them. Can increase up to 1 cup for a more tangy topping.)
⅓ cup (40 g) plain flour, sifted
9×13″ silicone or glass cake pan (metal reacts with lemon giving a metallic taste)
Shortbread Crust
1. Preheat oven to 160 °C (FF), line pan with parchment paper.
2. In a bowl, mix flour, cornstarch, icing sugar & salt to combine well. Next rub the butter into the dry mixture until it resembles a crumb-like consistency. Transfer to the lined silicone pan and evenly spread the mixture out, using your hands (or something with a flat bottom) to press the crumbs into the base of the tin. Once done, the base should look well combined and not loose. Bake for 20-25 minutes, or until lightly browned. (The browning will give the crust more flavor so don’t take the crust out too early – it’s delicious browned on the top and edges). While the crust is baking, make the lemon curd filling.
Lemon Curd Filling
3. To a large bowl add in sugar & lemon zest. Use your fingers to rub the zest into the sugar until the sugar has a light yellow tinge. Add in eggs, lemon juice & flour, and using a whisk, mix until well combined and no lumps of flour remain.
4. Once the crust is done, pour the lemon curd filling over the top of the warm base (don’t wait for the crust to cool), and bake for 20-25 minutes, or until the top is set (gently shake the tin and if the centre doesn’t jiggle then it’s done). Avoid overbaking so as soon as it sets take it out. *
5. Allow lemon bar to cool on the counter (about an hour), before refrigerating for 2 hours to fully set. Once set, lift the bar out of the pan using the parchment paper. Cut into 24 small lemon bars using a sharp knife (for a clean cut, wipe the knife clean after every slice), and dust with icing sugar before serving. (If you notice the tops of the lemon bars are slightly wet, use a clean paper towel to dab the tops before dusting with icing sugar).
6. To store, place the bars in an airtight container and keep refrigerated. Best served chilled!
NOTES:
Be careful not to under or over bake the lemon curd topping. To know if your lemon bars are done, gently shake the baking pan and if the curd is set (it doesn’t jiggle in the middle), then it’s done. As soon as it’s done, take the pan out of the oven. This will ensure that the lemon curd is baked enough so that it holds it’s shape, but not overbaked – otherwise your lemon bars will be rubbery and can taste more eggy too.
If your lemon bars have a strong eggy taste/smell, it’s likely due to the lemon curd being overbaked. Be sure to take the lemon bars out of the oven as soon as they’re done. Your oven may also be running a little hot. If you think this is the case, then reduce the temperature slightly when baking to allow the lemon curd to bake a little slower, and therefore less likely to overbake.
Due to the topping being a variation of a traditional lemon curd, it does have a slightly eggy/custardy nature to it – but it should be inviting and not repelling! If you are particularly sensitive to the smell/taste of curds or egg based baked goods, add a bit of extra lemon juice.
