Marshmallow Weet Bix Slice (https://www.notquitenigella.com/2024/01/29/marshmallow-weet-bix-slice)
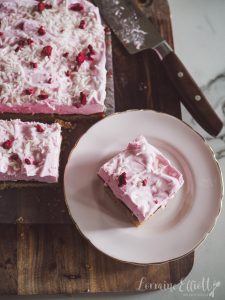
With a delicious crunchy coconut base, a layer of raspberry jam & the easiest marshmallow recipe ever (made without eggs) with some freeze dried raspberries on top, it’s the perfect snack for a party & will disappear in seconds! The base adds a lovely crunch that makes it so moreish! Perhaps an homage to the Iced Vovo biscuit – dare I say that I prefer these to the Iced Vovo?
Makes 9-12 slices

Ingredients:
BASE:
1 cup/150g/5ozs SR
1 cup/85g/3ozs desiccated coconut
50g/1.7ozs/3 Weet-bix, crushed
1/2 cup/110g/3.9ozs brown sugar
pinch salt
150g/5ozs browned butter, melted
TOPPING:
150g/5ozs raspberry jam
1 cup/250ml/ 8.8 fl ozs water
1 cup/220g/7.7ozs caster sugar
1 T /15g/0.5oz gelatine powder
a few drops pink food colouring
raspberry flavouring
3T coconut flakes
4 freeze dried raspberries, crumbled
Step 1 Preheat oven to 180C fan forced & line a lamington or slice tray (30x19cm/12×7.5 inches) on the base & sides, making sure to have some overhang so that you can easily lift the slice out. Place the flour, coconut, crushed Weet-bix, brown sugar & salt in a large bowl and mix with your hands. Add in the melted butter and mix well to combine. Press into the lined tin and bake for 15 minutes. Cool.
Step 2 Place the water, sugar & gelatine powder into a medium saucepan: whisk to combine. Place on low heat & stir to melt the sugar. Then increase to medium heat (not high or it will boil over easily) & bring to a boil: simmer for 5 mins. Chill completely (place the saucepan in a bowl of ice cubes to hasten this process). Do not whisk while the mixture is hot or it will take a very long time.
Step 3 -Add the syrup into a mixer fitted with a whisk attachment and whisk this mixture on high speed. It will take around 5 minutes. Add in pink colouring & the flavouring right near the end.
The marshmallow is ready when you have stiff peaks that hold.
Spread the base all over with the jam, spread the marshmallow over the jam base & then sprinkle with the coconut flakes & crumbled freeze dried raspberries.
Place in the fridge for at least 30 minutes to firm up.
Step 4 -Carefully peel back the parchment and cut into portions. Store in an airtight container.
You can also store this slice in the freezer for up to 3 months. I freeze them uncovered and then place them into an airtight container with parchment in between.
TIPS For Making This Marshmallow Weet Bix Slice
1 – Use fresh Weet bix for the crunch factor.
2 – You can brown the butter to give this even more flavour but it’s still delicious with regular melted butter too.
3 – The jam layer is optional and it wasn’t in the original recipe but I love this layer.
4 – Do not boil the syrup on high heat as it will boil over and make sure to watch it while it is boiling. Make sure that the syrup is completely cooled before beating it into a marshmallow. I usually put the saucepan of syrup in a bowl of ice water because I hate waiting for it to cool. It whips up in around 5 minutes to stiff peaks if it is cool. If the syrup is hot it won’t beat up properly and will take 20 minutes or so.
5 – Levelling up 1: The freeze dried raspberries are purely optional but I feel like their intense raspberry flavour and tang really balances this slice. I am holding them responsible for the 2 squares of slice that I ate haha. I used some freeze dried raspberries I was sent from the lovely people at Trinity Bites.
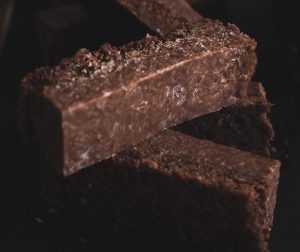
6 – Levelling up 2: Adding a coat of chocolate on top is also delicious. Melt 100g/3.5ozs of dark chocolate with 1 teaspoon coconut oil and mix it and pour it over the top for a really decadent slice.
NOTES FROM OTHERS:
This is similar to an old recipe I’ve been making for years. The base is about the same but has 2 teaspoons of golden syrup added to it & only uses 125 grams butter & 4 weetbix. It has 1 cup salted peanuts added to the mix & when cold is iced with chocolate icing & sprinkled with coconut.
– instead of coconut on base, try almond meal?
